
Email domain Ultimate
Right now your clients get emails from noreply@scraler.com. With your own domain they come from an address like hello@yourfitness.com.
You need an Ultimate plan, a domain you own and access to its DNS settings. Open Settings, then Email. Setup has four steps and the page remembers where you stopped.
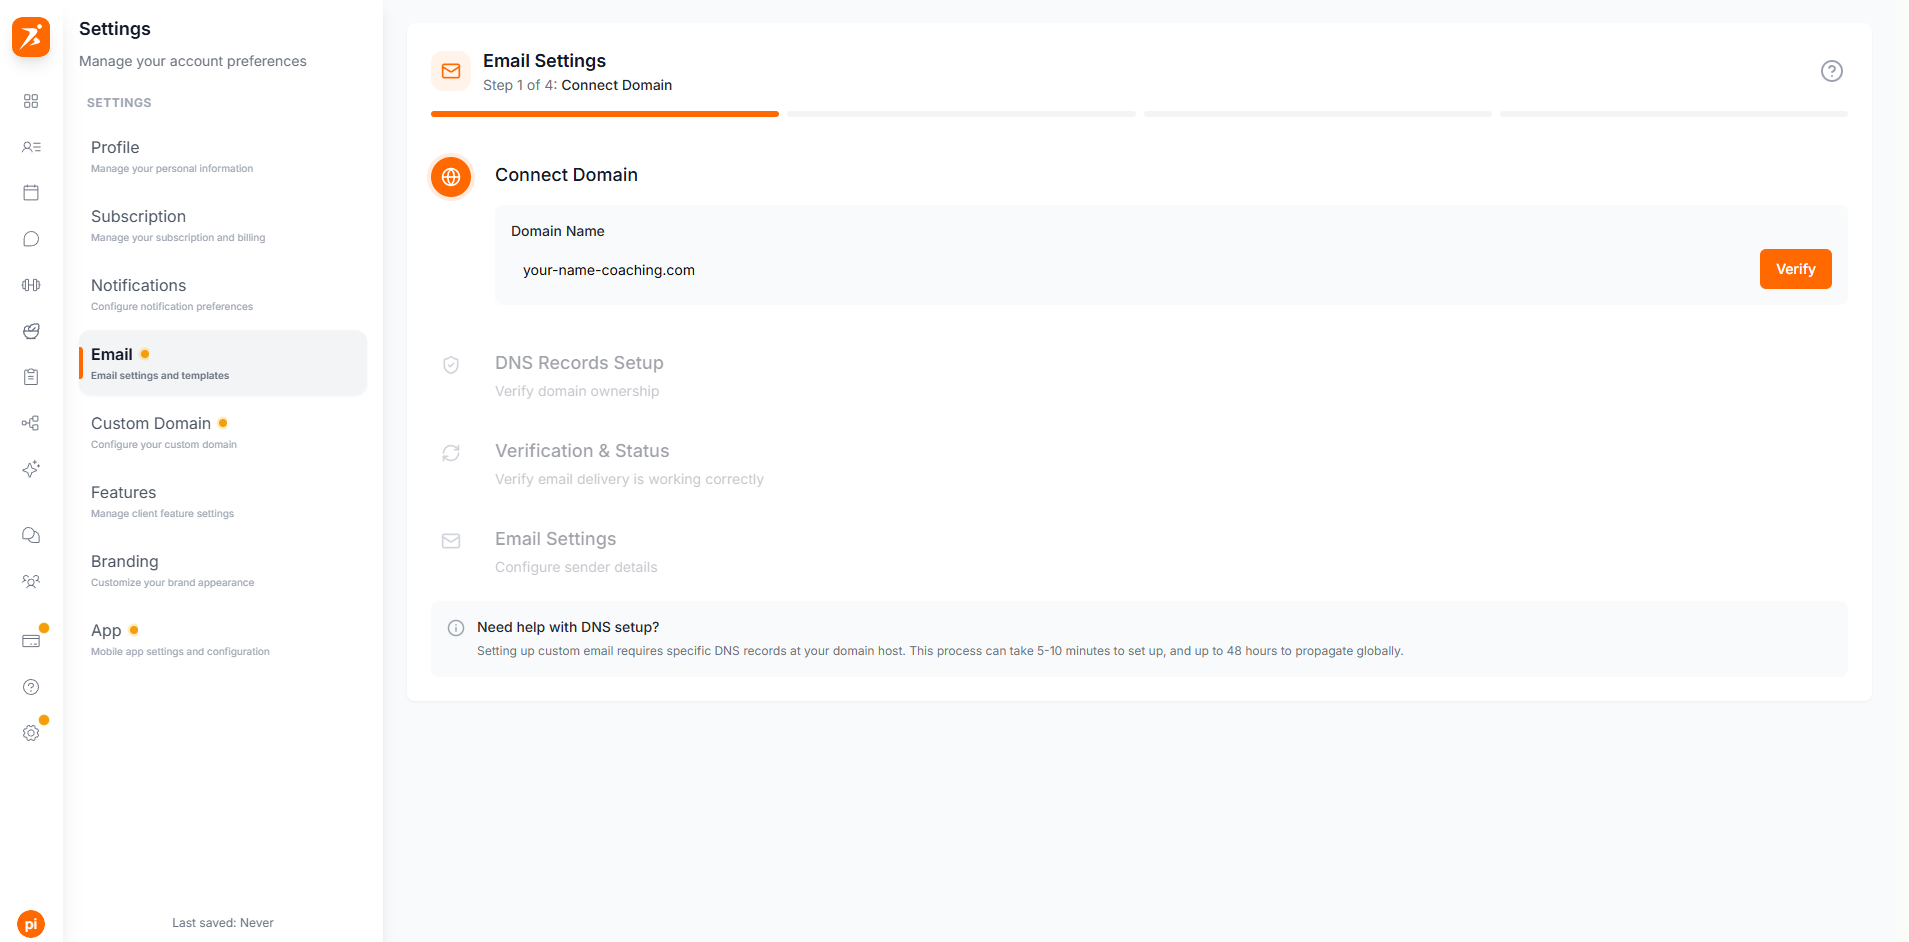
1. Connect Domain
Type your domain, for example yourfitness.com, and click Verify. Scraler saves it and moves to the next step.
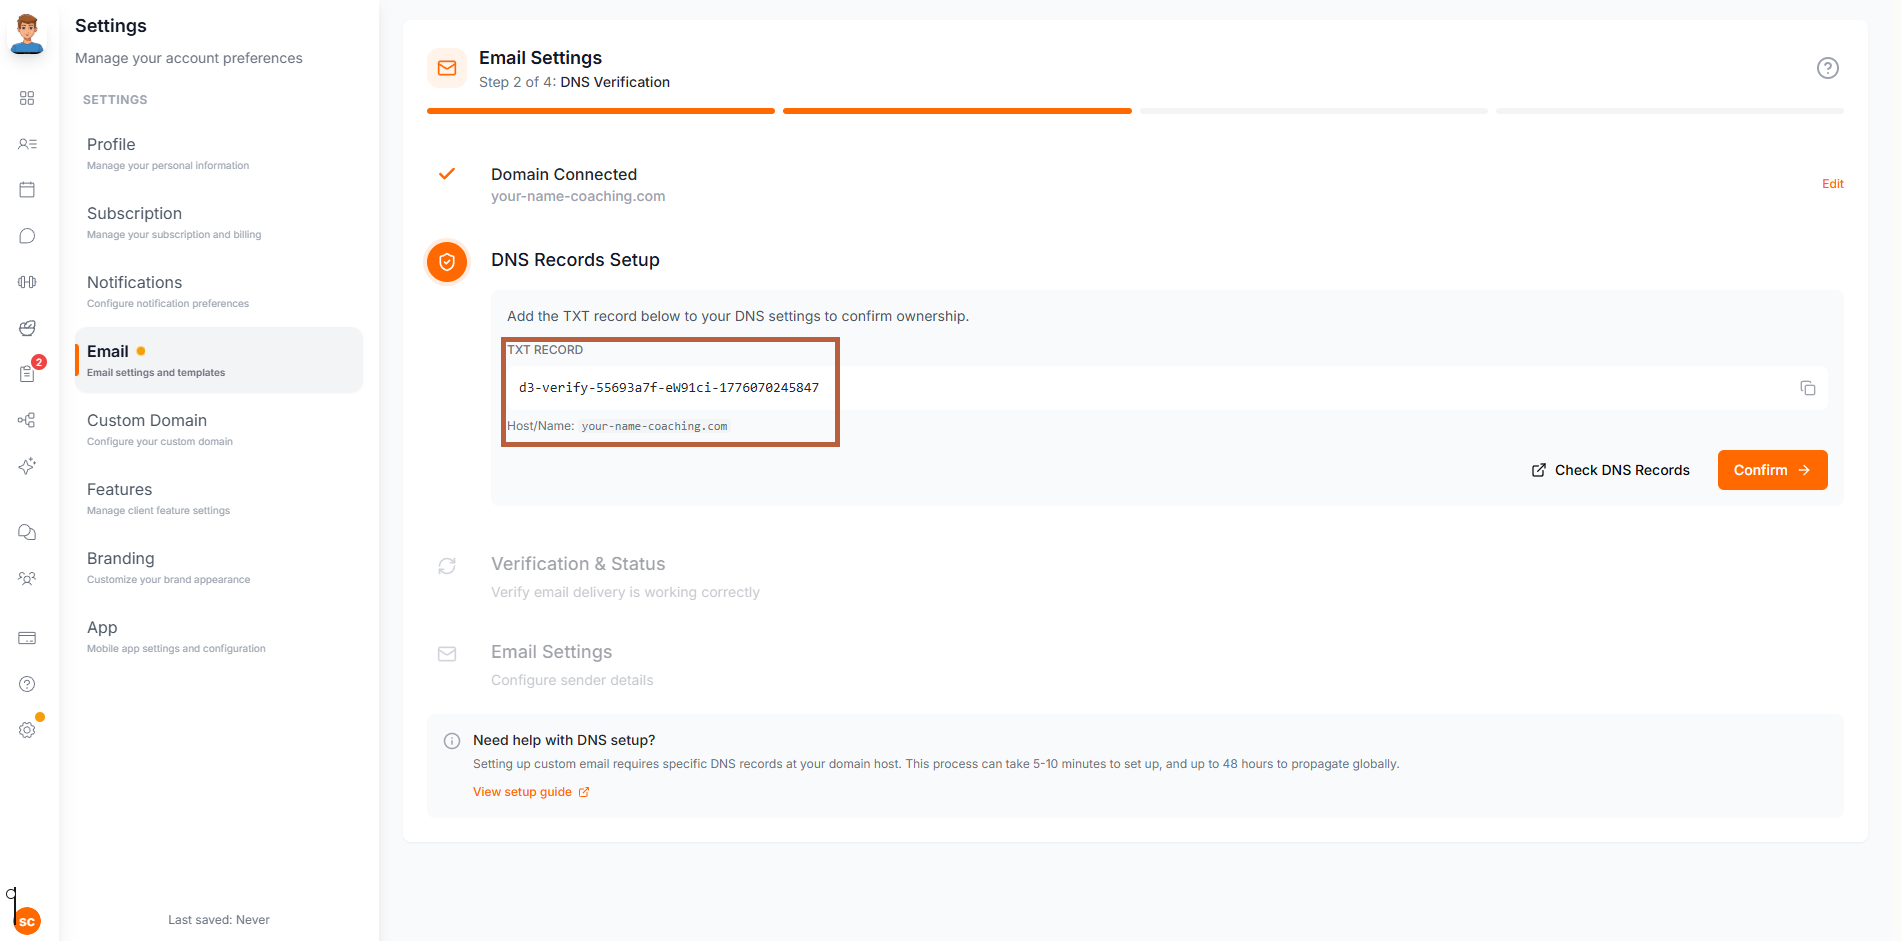
2. DNS Verification
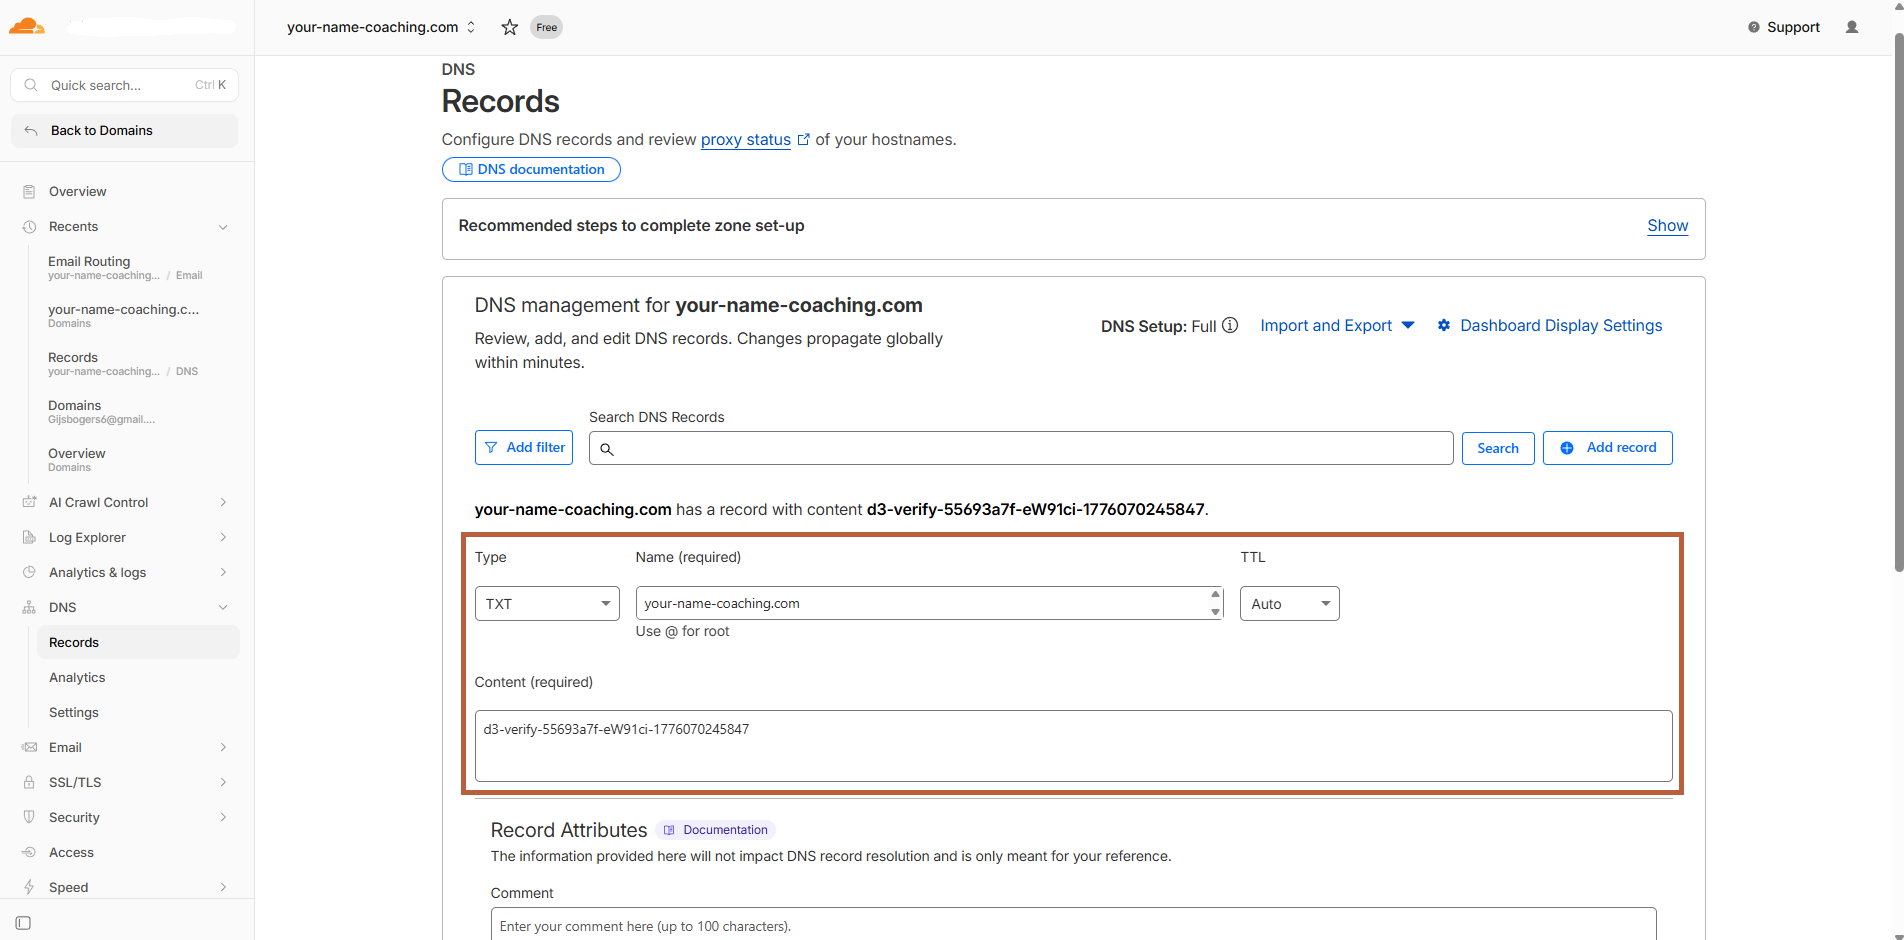
Scraler shows a TXT record. At your domain provider, add it with your domain as the name and the code as the value. Set the TTL to Auto. Wait a few minutes, then click Confirm.
3. Email Verification
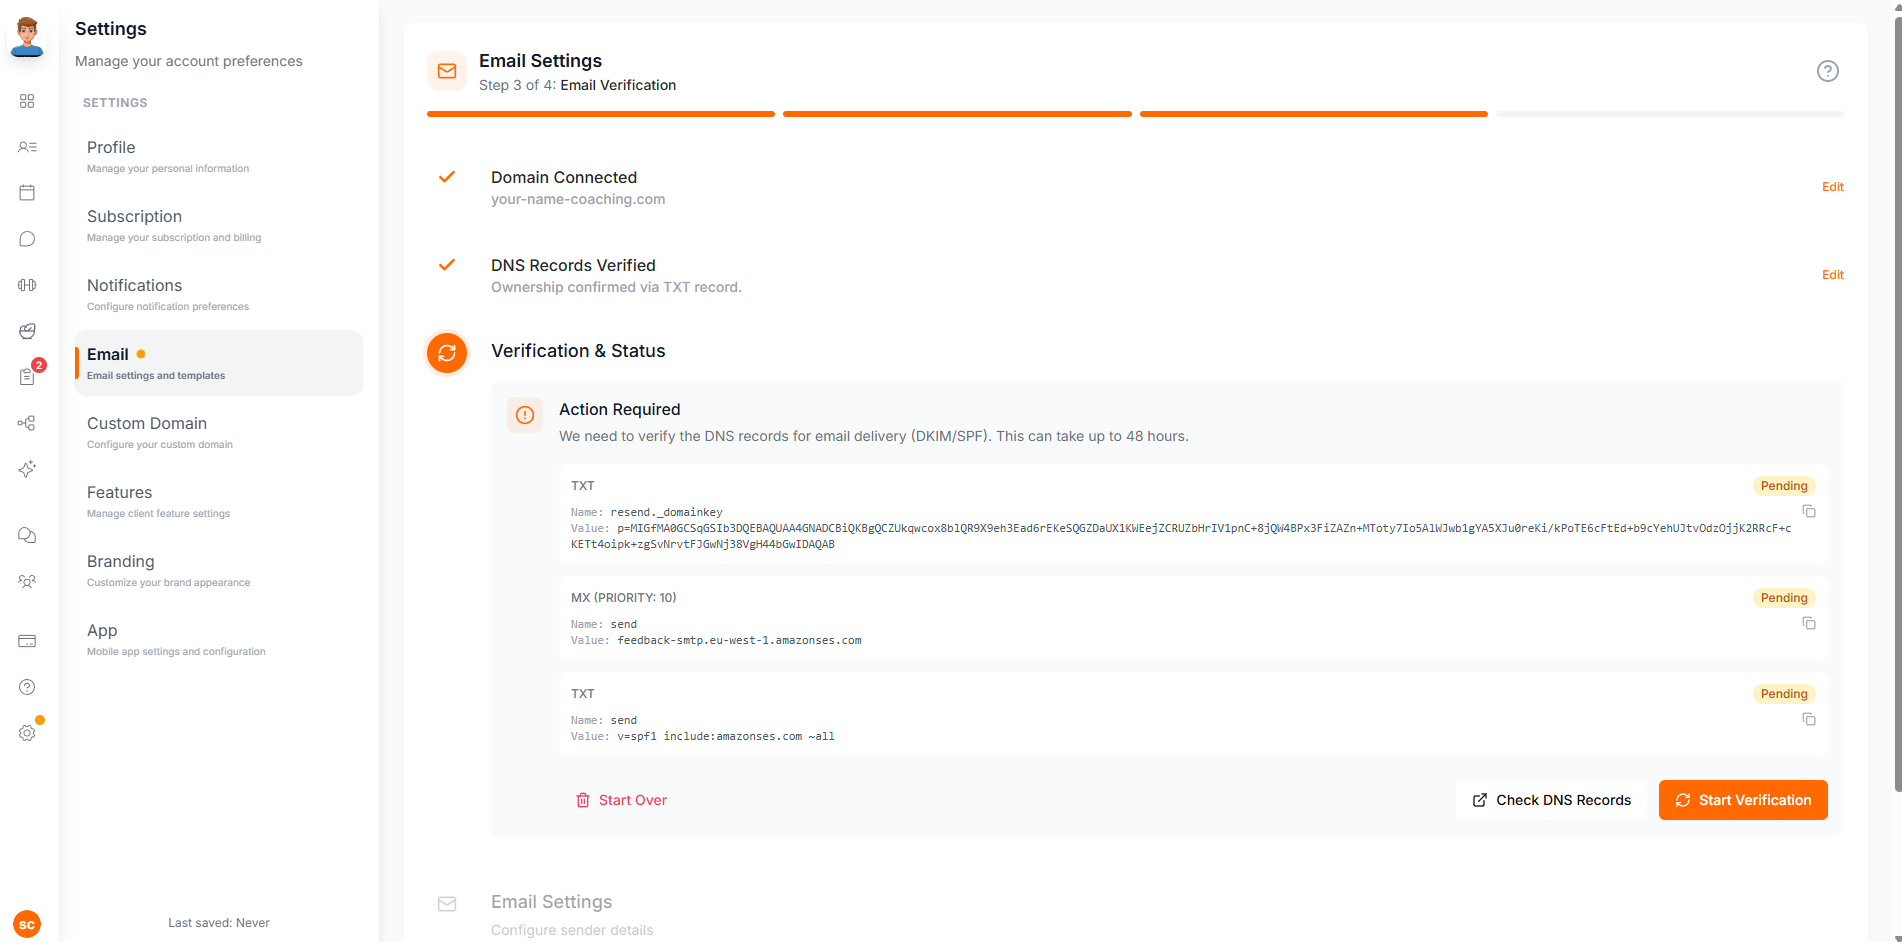
Scraler lists the records that let it send email for you. You usually add three: a DKIM TXT record, an MX record with priority 10 and an SPF TXT record. Then click Start Verification. Each record shows Pending until it is found. This can take up to 48 hours, and Scraler also checks on its own every minute.
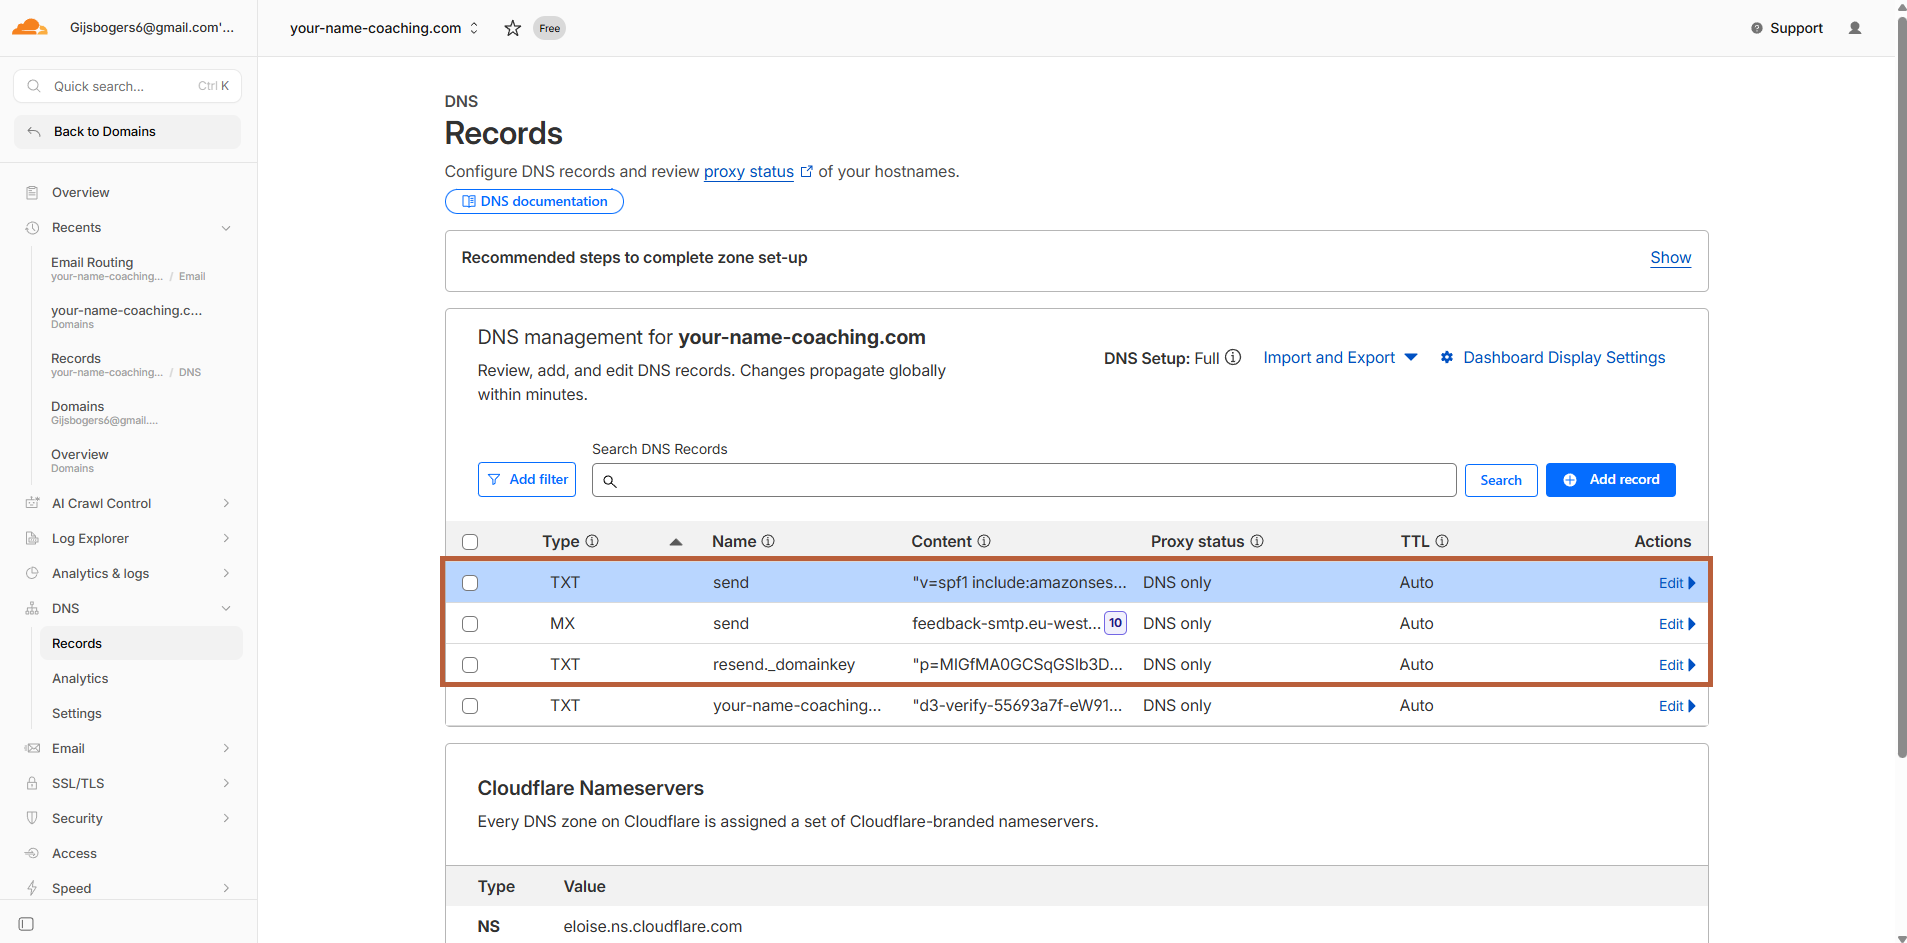
On Cloudflare, set every record to DNS only.
Not working?
- Wait. DNS can take up to 48 hours to spread.
- Copy every name and value exactly. Do not add your domain twice, like send.yourfitness.com.yourfitness.com.
- Check the MX record has priority 10.
4. Email Settings
Enter the Sender Name clients see in their inbox and the Sender Email, an address on your domain. Click Save.
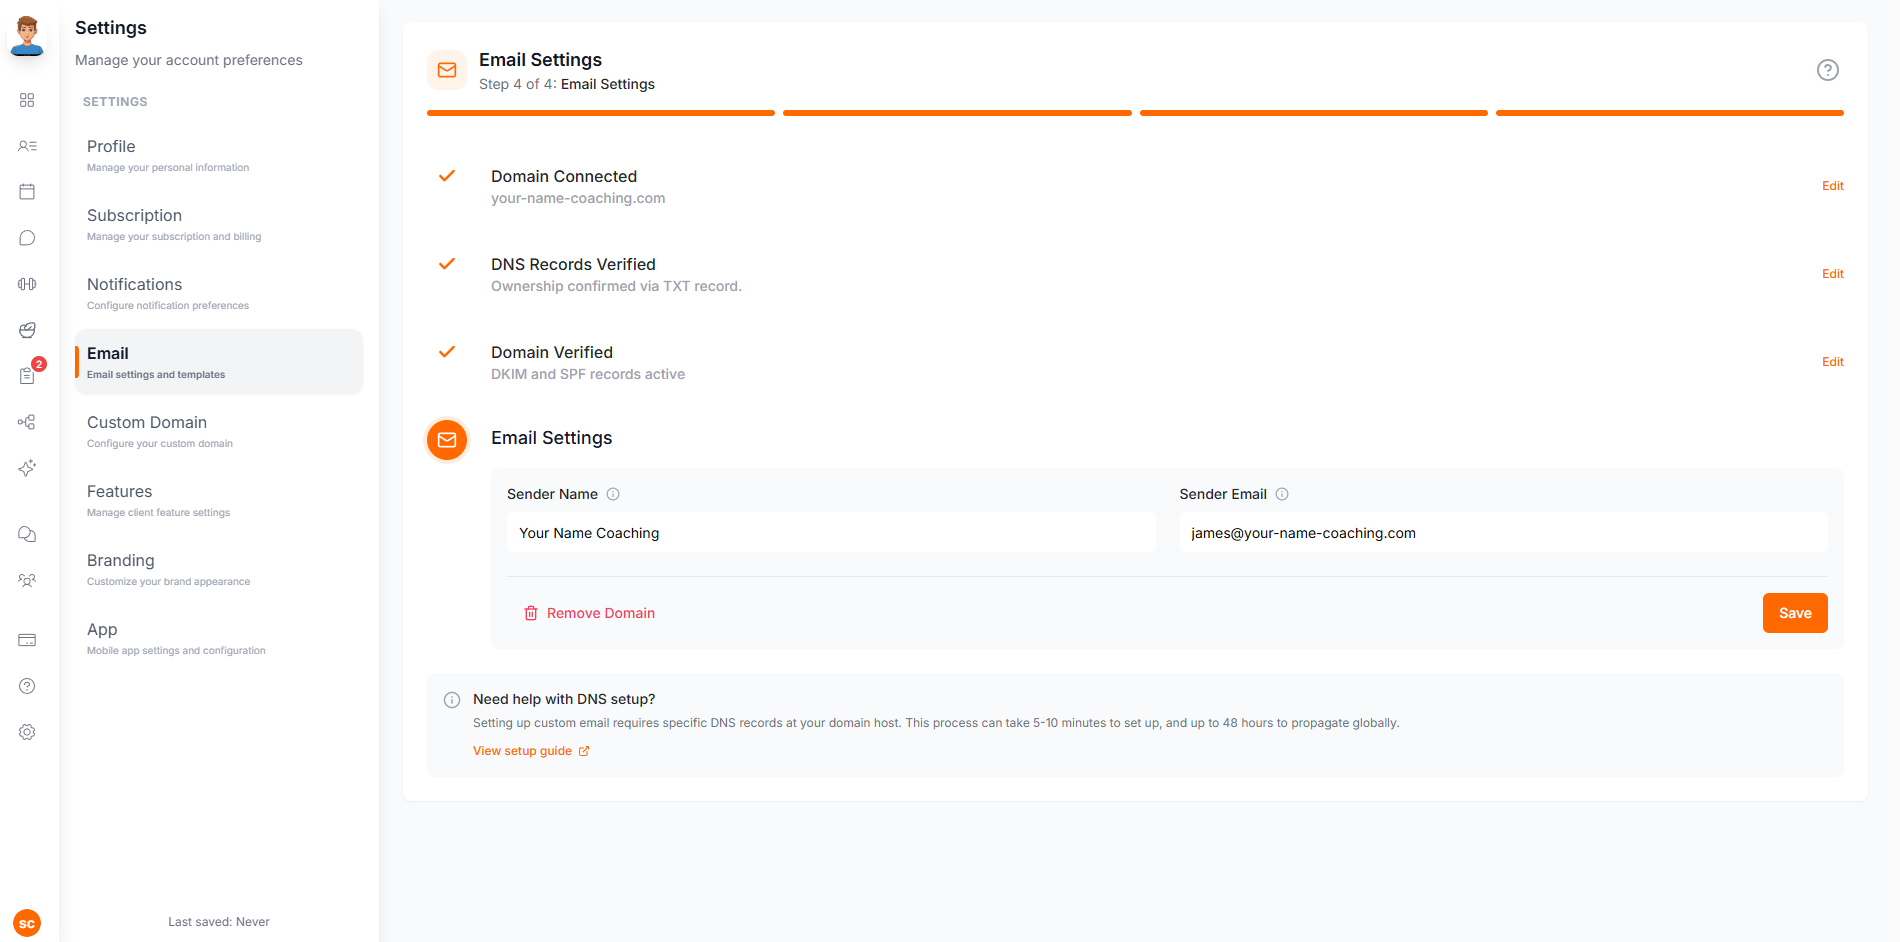
Emails from your domain
Once verified, all automated emails use your domain and your Branding style:
Good to know
If you click Remove Domain or Start Over, emails go back to noreply@scraler.com. Nothing breaks.
You do not need a mailbox or email hosting. Scraler only sends from your domain. It does not receive mail.